
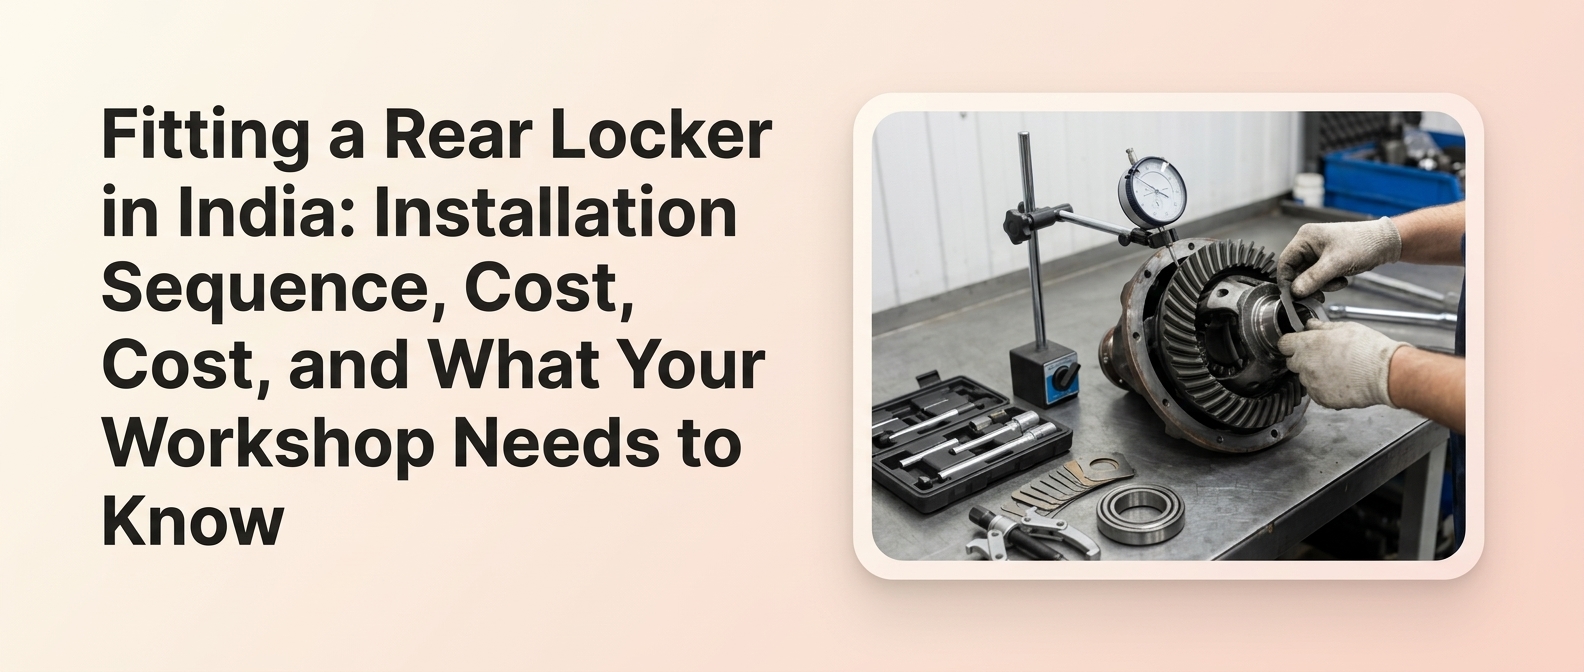
Rear locker installation in India is a precision differential setup job, not a bolt-on accessory fit. This workshop-grade reference walks Indian 4×4 workshop owners, service managers, and drivetrain-capable technicians through fitment confirmation, tooling, the correct teardown-and-reassembly sequence, backlash and bearing preload cautions, air line or wiring routing, and post-install QC – plus how to quote the job accurately.
A rear locker can be fitted to a compatible stock open differential, but it replaces or modifies the carrier and requires full differential setup – not a simple bolt-on. Success depends on confirming axle code, spline count, and ratio, then correctly setting backlash, bearing preload, and contact pattern before routing air lines or wiring.
Key takeaways
- A rear locker can be fitted to a compatible stock open differential, but it is a precision setup job, not a bolt-on accessory.
- Backlash and bearing preload almost always need to be checked and are often reset when the carrier changes – even when the original ring and pinion are reused.
- Correct workshop tooling (dial indicator, bearing puller/press, torque wrench, setup bearings) separates a reliable install from a comeback.
- Air lockers add a compressor, solenoid, and air line routing; electric lockers add wiring, switch, fuse, and relay integration.
- Installation cost in India is best understood as buckets: locker unit + labour + bearings/seals + actuation hardware + oil + setup corrections.
- Post-install engagement testing, leak checks, road testing, and break-in guidance are required stages, not optional extras.
What a rear differential locker does and when it makes sense
An open differential lets the two rear wheels turn at different speeds, which is ideal for road driving but sends torque to the wheel with the least grip. When one rear tyre lifts or loses traction, the axle can send drive to that spinning wheel while the gripping wheel sits dead – the classic one-wheel-spin situation off-road. A rear locker mechanically ties both axle shafts together so both wheels drive equally regardless of individual traction.
A rear locker earns its place in several Indian use cases:
- Technical trail driving with rock steps, ruts, and cross-axle situations
- Mud and water crossings where one wheel routinely unloads
- Expedition and overland travel where recovery difficulty is high
- Farm and utility work on loose or broken ground
- Mixed highway-trail builds where the vehicle drives on-road but needs capability off it
Rear locker vs traction control: when a manual locker still matters
Electronic traction control brakes a spinning wheel to redirect torque, which helps in many conditions. But it reacts after slip begins, can build heat under sustained load, and depends on brake and sensor behaviour. A selectable air or electric diff locker provides a direct mechanical lock when engaged.
- Traction control is automatic but reactive and load-limited.
- A selectable locker gives full, deliberate lock when engaged.
- Serious low-speed crawling and heavy cross-axle articulation still favour a locker.
Can a rear locker be fitted to a stock open differential?
Yes, on compatible axles – many rear lockers replace the stock open differential carrier – but it is rarely a simple bolt-on. Fitment depends on axle design, spline count, gear ratio, and whether ring gear transfer, carrier bearing setup, backlash adjustment, and air or electrical routing are required. Correct measurement and setup determine noise, heat, and longevity.
Manufacturer documentation confirms that many lockers are engineered as carrier-replacement units for axles that originally use an open differential. The locker center is installed in place of the OE carrier, and the original ring gear (crown wheel) is usually transferred onto it.
- “Compatible” means the axle housing, carrier type, spline count, ring-gear bolt pattern, and gear ratio all match the locker’s application listing.
- Some lockers are simpler to package on their target axle than others, but most carrier-replacement units still require carrier removal, ring gear transfer, and fresh setup.
- Because a new carrier introduces its own machining tolerances and bearing seats, the original shim setting often does not return exactly to spec – precision setup is what separates a quiet, durable install from a noisy one.
How to identify axle code and compatibility
Ordering by vehicle nameplate alone is risky because a single model and model year can carry more than one rear axle variant. Confirm the exact axle before ordering.
- Identify the vehicle platform (for example Suzuki Jimny, Mahindra Thar, Maruti Gypsy, Mahindra Bolero/Scorpio/MM540/MM550, Tata Xenon, Toyota Hilux/Fortuner).
- Read the axle tag or housing stamping to confirm the axle model.
- Count the axle-shaft splines.
- Check ring-gear diameter and bolt pattern.
- Confirm the gear ratio.
- Match all of the above against the locker manufacturer’s application/part-number list.
A workshop fitment matrix for Indian platforms is best built from OE workshop manuals and locker manufacturer application catalogues so ordering is based on the axle, not only the vehicle badge.
Rear locker fitment checklist: what to confirm before teardown
The most common cause of extended vehicle downtime is starting teardown before all fitment details and consumables are confirmed. Lock these down at intake.
- Vehicle platform and exact rear axle variant confirmed
- Gear ratio and spline count verified against the locker application list
- Locker type ordered (air, electric, or mechanical) confirmed against the axle
- Carrier bearings on hand (or setup bearings for trial fitting)
- Pinion seal, axle seals, and O-rings available
- Shim assortment for backlash and preload correction
- Correct sealant for the housing/cover mating surface
- OE-specified diff oil in the correct grade and quantity
- Air fittings, nylon line, compressor, and solenoid (air locker) or wiring harness, switch, fuse, and relay (electric locker) staged
India shop reality: Vehicle downtime expands sharply if bearings, shims, seals, or air line fittings are not stocked before teardown. Confirm parts availability at quoting, not mid-job.
Capture this on a standard Rear Axle Fitment Intake Sheet so nothing is discovered missing after the carrier is out.
Tools, consumables, and parts your workshop should have ready
A proper rear locker install needs more than hand tools. Typical requirements include a torque wrench (including an inch-pound wrench for preload checks where applicable), a dial indicator, a bearing puller, a hydraulic press, setup bearings, seal drivers, and axle removal tools. Air lockers add compressor, solenoid, and air line tooling; electric lockers add wiring and switch tools.
The gap between a reliable install and a comeback is usually measurement capability. A workshop that can read backlash, set preload, and check a contact pattern is equipped for the job; one relying on hand tools alone is not.
| Tool / consumable | Mandatory / optional | Stage used | Why it matters | What goes wrong without it |
| Dial indicator | Mandatory | Backlash setup, baseline recording | Measures backlash accurately | Guesswork causes whine, heat, wear |
| Torque wrench (ft-lb) | Mandatory | Ring gear, caps, cover, housing | Correct fastener load | Loosening, leaks, or thread damage |
| Inch-pound torque wrench | Mandatory (where preload spec applies) | Pinion/carrier preload checks | Verifies rotating preload | Bearing noise or premature failure |
| Bearing puller | Mandatory | Carrier bearing removal | Clean bearing removal | Damaged bearings or carrier |
| Hydraulic press | Mandatory | Bearing install, ring gear | Controlled press fit | Cocked or damaged bearings |
| Setup bearings | Recommended | Shim trial fitting | Fewer press cycles | Repeated pressing, damage risk |
| Seal drivers | Mandatory | Seal installation | Square, leak-free seals | Leaks and premature seal wear |
| Marking compound | Mandatory | Contact pattern check | Verifies mesh | Blind setup, gear failure risk |
| Sealant | Mandatory | Housing/cover reassembly | Seals mating surface | Diff oil leaks |
| Air line/wiring tools | As per locker type | Actuation routing | Reliable engagement | Non-engagement, pinched lines, faults |
Pro tip: Use setup bearings where the axle design allows. Trialling shim stacks on slip-fit setup bearings avoids repeated press cycles on new bearings during backlash selection.
Step-by-step rear locker installation sequence
This sequence mirrors established manufacturer procedures for carrier-replacement lockers. Document every disassembly step with photos and notes so reassembly is repeatable and setup can be restored to spec.
- Confirm compatibility and record the baseline. Verify axle, ratio, and spline count. Record existing backlash and note the contact pattern before touching anything.
- Lift the vehicle, drain diff oil, remove axle shafts. Support the vehicle correctly and pull the axle shafts (a slide hammer may be needed on some axles).
- Remove the carrier. Note bearing cap orientation and shim positions exactly. Photograph and label everything.
- Transfer the ring gear (crown wheel) onto the locker carrier if required.
- Install the locker unit and carrier bearings, typically using a press.
- Set backlash and bearing preload to spec using shims or threaded adjusters.
- Verify the contact pattern with marking compound and correct as needed.
- Route the air line or wiring harness for the locker’s actuation type.
- Reassemble, apply sealant, and refill diff oil to the OE grade and quantity.
- Function-test the locker, leak-test, and road-test before handover.
Exact fastener torque values are axle- and locker-specific and must come from the OE workshop manual or the locker manufacturer’s application sheet.
How to transfer the ring gear safely
The ring gear carries the entire drive load, so its transfer must be clean and controlled.
- Mark ring-gear orientation before removal for reference.
- Remove ring-gear bolts evenly and inspect threads and mating surface.
- Clean the new carrier’s ring-gear register thoroughly.
- Draw the ring gear onto the carrier squarely; never hammer it home.
- Torque ring-gear bolts evenly in the correct sequence.
Workshop caution: Ring-gear bolts and their torque sequence are safety-critical. Use the OE or locker manufacturer’s specified values – do not estimate.
When to reuse bearings and when to replace them
Carrier bearings take a beating during removal, which influences the reuse decision.
- Replace carrier bearings if they were pulled destructively, show pitting, roughness, or discolouration.
- Replace pinion seals and axle seals as standard practice on reassembly.
- Reuse only bearings that come off cleanly and measure/spin perfectly – an uncommon outcome after pulling.
- Keep old bearings honed to slip fit as setup bearings for trial shimming.
Ring gear, carrier bearings, shim packs, and setup cautions
Differential setup is where locker installs succeed or fail. A new carrier changes bearing seats and shim geometry, so the backlash, preload, and contact pattern must all be re-established for the new assembly – even when the ring and pinion are reused.
| Parameter | Why it matters | How checked | Common error | Consequence if wrong |
| Backlash | Controls gear mesh clearance | Dial indicator on ring gear | Assuming old setting carries over | Whine, clunk, tooth stress |
| Bearing preload | Sets bearing load and stability | Rotating torque check or axle-specific preload method | Too loose or too tight | Noise, heat, early failure |
| Contact pattern | Confirms correct mesh | Marking compound | Skipped verification | Gear scuffing and failure |
| Shim thickness | Positions carrier and gear | Measured selection | Wrong stack after carrier swap | Backlash and pattern errors |
| Pinion depth | Positions pinion in mesh | Pattern reading and axle-specific setup procedure | Ignored when pattern shows a problem | Poor pattern, noise, wear |
Workshop caution: Do not assume the old backlash setting carries over after a carrier change. Measure it fresh and adjust to spec.
How to check contact pattern after reassembly
The contact pattern is the final proof that the mesh is correct.
- Apply marking compound to several ring-gear teeth.
- Rotate the gear both ways under light resistance.
- Read the drive-side and coast-side pattern. Adjust backlash and, where required by the pattern and axle setup, correct pinion position using the proper service procedure.
- Re-check after every adjustment until the pattern and backlash are both within spec.
Do you need to reset backlash and bearing preload?
In most rear locker installations, backlash must be checked and is often reset because the carrier assembly changes. Even when the ring and pinion are reused, carrier position, shim thickness, and bearing seats can shift the measurement off spec. Skipping this step risks gear noise, heat build-up, and accelerated wear.
The reason is machining tolerance. A replacement carrier and new bearings almost never reproduce the exact position of the parts they replaced, so the original shim stack rarely returns backlash to specification. That is why manufacturer procedures always require measuring backlash with a dial indicator and adjusting shims or threaded adjusters after installation.
Skipped or incorrect setup shows up as gear whine, a clunk on load transitions, excessive heat, and premature gear or bearing failure. These symptoms are almost always a setup fault, not a fault of the locker concept.
Air line routing or wiring harness routing: what changes by locker type
Actuation is where the install work diverges by locker type. Air lockers require a compressed-air system; electric lockers require electrical integration; mechanical automatic lockers need little actuation hardware but change on-road behaviour. On vehicles with electronic driver aids, routing and control layout should avoid interference with existing systems, and selectable lockers should give the driver a clear dashboard switch.
| Locker type | Actuation method | Install complexity | Extra components | Workshop cautions | Serviceability |
| Air / pneumatic | Compressed air | Higher | Compressor, solenoid, air lines, bulkhead fitting | Abrasion, heat, and pinch protection for lines; seal bulkhead correctly | Serviceable but more parts |
| Electric / electronic | 12V electrical actuation | Moderate | Wiring harness, switch, fuse, relay | Correct fuse/relay, secure grounds, chafe protection | Fewer external parts |
| Mechanical / automatic | Internal mechanical | Lower actuation | Minimal actuation hardware | Changes on-road handling behaviour | Simple, fewer failure points |
Why compressor mounting location affects reliability
An air locker’s compressor placement drives its long-term reliability. Mount it wrong and you invite heat soak, moisture ingress, and vibration failures.
- Choose a dry, ventilated location away from direct exhaust heat.
- Protect from water and dust in engine-bay or cargo mounting.
- Mount on a solid bracket to control vibration.
- Keep it accessible for service and air line connection.
How to avoid air line pinch points
Air lines fail when routed without allowance for suspension movement and heat.
- Route for full axle articulation with slack at the axle.
- Keep lines clear of exhaust and other heat sources.
- Use abrasion protection where lines cross edges or brackets.
- Secure lines so they cannot snag on trail obstacles.
- Test the routing through the full suspension travel before final clipping.
Diff oil, sealant, leak checks, and final reassembly
Reassembly quality determines whether the vehicle leaves leak-free. Clean, correctly sealed mating surfaces and the right oil are as important as the setup itself.
- Clean the housing and cover mating surfaces completely, then apply the correct sealant evenly.
- Refill with the OE-specified gear oil grade and quantity; avoid friction-modifier additives unless the locker manufacturer recommends them.
- For air lockers, leak-test the bulkhead, seal housing, and lines (a soapy-water check reveals slow leaks and prevents non-engagement).
- For electric lockers, verify switch, relay, and circuit function.
- Re-check all fasteners to their specified torque.
Customer communication: Explain that locker installation is not a bolt-on accessory job. Setup accuracy – backlash, preload, sealing, and routing – is what determines noise, heat, and longevity.
Road test, engagement test, and break-in checklist
Post-install testing is a required stage of the job, not an optional extra. It confirms engagement, catches leaks before the customer does, and protects the new gear set during break-in.
- Function test: engage and disengage the locker and confirm actuation.
- Leak recheck: inspect the housing, cover, seals, and air fittings after warm-up.
- Road test: drive at varied speeds, listening for abnormal gear noise and feeling for vibration.
- Break-in guidance: advise gentle operation and no heavy towing or sustained high load immediately after install; recommend an early oil check.
- Owner handover: explain when to engage and disengage, and that the vehicle should not be driven locked on high-grip surfaces or through sharp on-road turns.
Record this on a Post-Install QC / Road Test & Leak Check Sheet and hand a copy to the owner.
How long does a rear locker installation take?
Installation time depends on axle type, locker design, and workshop tooling. A prepared shop with the right pullers, press, dial indicator, and setup experience finishes faster than a general garage. Add time for bearing replacement, compressor mounting, or wiring and air line routing.
The main time drivers are:
- Axle design (removable carrier vs Salisbury-type with a diff cover)
- Locker type (air adds compressor and lines; electric adds wiring; mechanical adds least)
- Whether bearings and seals are replaced or reused
- Tooling readiness and the technician’s diff-setup experience
For quoting, treat it as a half-day to full-day driveline job depending on axle layout, locker type, and whether setup corrections or extra hardware work are required.
Rear locker installation cost in India: what affects the quote
Rear locker installation cost in India includes the locker unit, bearings and seals if replaced, compressor or wiring components, differential setup labour, oil, and post-install testing. Total varies by axle type, vehicle platform, and whether the workshop already handles ring-and-pinion setup work in-house.
Quote the job in buckets rather than a single figure. The headline part price is not the total – bearings, seals, actuation hardware, and any setup corrections all add to it.
| Job component | Parts involved | Labour intensity | Cost driver | Indicative range | Notes |
| Locker unit | Locker center | – | Axle/locker type | Varies by axle and brand | Core part |
| Setup labour | – | High | Diff experience, axle | Varies with axle complexity and setup time | Backlash, preload, pattern |
| Bearings & seals | Carrier bearings, seals, O-rings | Moderate | Replacement vs reuse | Usually a separate consumables line item | Often replaced |
| Actuation hardware | Compressor/lines or harness/switch | Moderate–high | Air vs electric | Air systems usually add more hardware cost | Type-dependent |
| Oil & consumables | Diff oil, sealant, shims | Low | OE spec | Modest but essential | Per axle |
| Setup corrections | Extra shims/hardware | Variable | Unexpected findings | Best quoted as contingency | Contingency |
Always quote with contingency for bearings, seals, shim corrections, and actuation hardware – not the locker unit alone.
When to do the job in-house and when to refer to a differential specialist
Be honest about capability. A general garage can supply and fit accessories, but ring-and-pinion-grade setup requires specific tools and experience. Doing the job without them risks damaging an expensive gear set and locker.
Do it in-house if you have:
- A dial indicator and the ability to read and set backlash
- An inch-pound torque wrench for preload where the axle requires it
- A bearing puller and hydraulic press
- Prior ring-and-pinion setup experience and contact-pattern reading skill
Refer to a specialist if:
- You lack measurement or press tooling
- Your team has not done differential setup before
- The axle variant or locker type is unfamiliar
Common post-install callbacks usually trace to a few causes: leaks from poor sealing or unseated air fittings, noise from incorrect backlash or preload, non-engagement from pinched air lines or wiring faults, and premature wear from wrong oil or skipped break-in.
Why Lamda Components’ precision-manufacturing view improves install quality
Lamda Components Pvt. Ltd. is a Bangalore-based manufacturer established in 1987, specializing in aluminium die casting, precision steel parts, precision machining, die making, and off-road vehicle accessories. That manufacturing discipline aligns closely with what a reliable locker install depends on: fitment accuracy, sealing-surface quality, and thread integrity.
- Machining accuracy supports consistent component fitment and reduces rework.
- Quality mating and sealing surfaces help reduce leak risk at reassembly.
- Consistent thread quality supports correct, repeatable fastener torque.
- End-to-end manufacturing with quality control and fast turnaround helps parts availability stay aligned with workshop scheduling.
This precision-first view supports Lamda’s workshop-focused approach to rear locker installation guidance in India. Explore the Lamda differential locker page, the diff lockers page, and the Jimny locker page for fitment context.
For fitment confirmation and workshop-grade support, Contact us.
Frequently asked questions
Can a locker be installed in a stock open differential?
Yes, on compatible axles. Many rear lockers replace the stock open carrier, retaining the original ring and pinion. Fitment depends on axle model, spline count, and ratio, and the job requires full differential setup – measuring and adjusting backlash, preload, and contact pattern.
Do you need to reset backlash when installing a differential locker?
In most cases, yes. Backlash must be checked and is often reset because the new carrier changes bearing seats and shim geometry. Even with the original ring and pinion reused, the old shim setting rarely returns backlash to spec, so it must be re-measured and adjusted.
How long does a rear locker installation take?
It varies by axle type, locker design, tooling, and technician experience. A prepared differential shop finishes faster than a general garage, and bearing replacement, compressor mounting, or wiring adds time. Most workshops should quote it based on axle layout and locker type rather than treating it as a simple accessory fitment.
How much does it cost to install a rear differential locker in India?
Cost is best broken into buckets: the locker unit, bearings and seals if replaced, actuation hardware, differential setup labour, oil, and post-install testing. Total varies by axle, platform, and workshop capability.
What tools are required to install a rear locker?
A dial indicator, torque wrenches (including inch-pound for preload where applicable), a bearing puller, a hydraulic press, setup bearings, seal drivers, and axle removal tools. Air lockers add compressor and air line tools; electric lockers add wiring and switch tools.
Is an air locker harder to fit than an electric locker?
Air lockers generally add more work: a compressor, solenoid, bulkhead fitting, and protected air line routing. Electric lockers instead require a wiring harness, switch, fuse, and relay integration. Both need careful routing to coexist with existing vehicle systems.
Do bearings and seals need to be replaced every time?
Seals are typically replaced as standard on reassembly. Carrier bearings should be replaced if pulled destructively or if they show pitting, roughness, or discolouration. Only bearings that come off cleanly and measure perfectly should be reused, which is uncommon.
What happens if backlash is not set correctly?
Incorrect backlash causes gear whine, clunk on load transitions, excessive heat, and accelerated wear. Too little clearance or too much preload builds heat and leads to early gear and bearing failure. These are setup faults, not faults of the locker itself.
Is rear locker installation suitable for every workshop?
No. It suits workshops with differential setup tooling – dial indicator, press, puller, inch-pound torque wrench – and prior ring-and-pinion experience. Shops lacking measurement tools or setup experience should refer the job to a differential specialist to avoid damaging gear sets.
